React Server Actions: Complete Guide with Real-World Examples
React Server Actions: Complete Guide with Real-World Examples
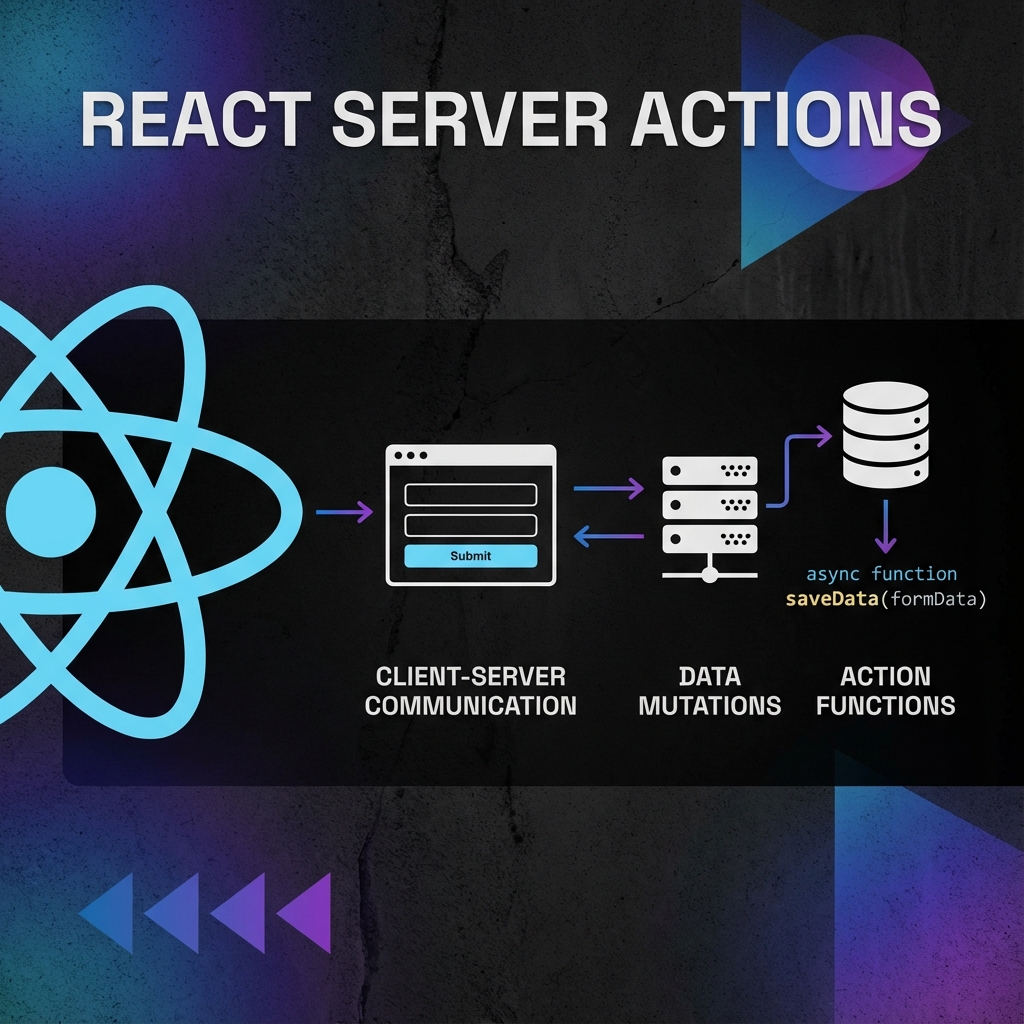
React Server Actions represent a paradigm shift in how we handle form submissions and data mutations in Next.js applications. Instead of creating API routes and writing client-side fetch calls, Server Actions let you define server-side functions that can be called directly from your components.
This comprehensive guide will take you from the basics to advanced patterns, with real-world examples you can apply to your projects today.
What Are React Server Actions?
React Server Actions are asynchronous functions that run exclusively on the server. They can be called from Client or Server Components, making it incredibly simple to perform data mutations without manually creating API endpoints.
Key Characteristics
The "use server" Directive
- **Server-Only Execution**: Server Actions never run in the browser, protecting sensitive logic and reducing client JavaScript
- **Direct Form Integration**: Works seamlessly with HTML forms, even with JavaScript disabled
- **Progressive Enhancement**: Forms work without JavaScript, with enhanced experience when enabled
- **Type Safety**: Full TypeScript support with inferred types from function signatures
- **Error Handling**: Built-in error boundaries and validation states
Server Actions are marked with the `"use server"` directive, which can be placed at the top of a file (inline) or before a function definition.
// Inline directive - All functions in this file become Server Actions
// app/actions.ts
'use server'

export async function createUser(formData: FormData) {
  // Server-side code here
}

// Or use the directive before a specific function
export async function deleteUser(id: string) {
  'use server'
  // This function only is a Server Action
}
Why Use Server Actions Instead of API Routes?
Before Server Actions, the typical pattern for form handling involved creating API routes and writing client-side fetch logic. Let's compare the two approaches.
Before: API Routes Approach
// Before: API route at app/api/contact/route.ts
import { NextResponse } from 'next/server'

export async function POST(request: Request) {
  const body = await request.json()
  // Validate and process
  await sendEmail(body)
  return NextResponse.json({ success: true })
}

// Before: Client component with fetch
'use client'

import { useState } from 'react'

export function ContactForm() {
  const [isSubmitting, setIsSubmitting] = useState(false)

  async function handleSubmit(e: React.FormEvent) {
    e.preventDefault()
    setIsSubmitting(true)
    const formData = new FormData(e.target as HTMLFormElement)
    const data = Object.fromEntries(formData)

    try {
      const response = await fetch('/api/contact', {
        method: 'POST',
        headers: { 'Content-Type': 'application/json' },
        body: JSON.stringify(data),
      })
      // Handle response...
    } finally {
      setIsSubmitting(false)
    }
  }

  return (
    <form onSubmit={handleSubmit}>
      {/* Form fields */}
    </form>
  )
}
After: Server Actions Approach
// After: Server Action in app/actions.ts
'use server'

export async function submitContactForm(formData: FormData) {
  // Direct access to FormData - no JSON parsing needed
  const email = formData.get('email') as string
  const message = formData.get('message') as string

  // Validate and process
  await sendEmail({ email, message })
  return { success: true }
}

// After: Simplified client component
'use client'

import { submitContactForm } from '@/app/actions'

export function ContactForm() {
  return (
    <form action={submitContactForm}>
      <input type="email" name="email" required />
      <textarea name="message" required />
      <button type="submit">Send</button>
    </form>
  )
}
The Server Actions approach is significantly cleaner with less boilerplate code.
How Server Actions Work with React Server Components
Server Actions are designed to work seamlessly with both Server and Client Components. Understanding this relationship is key to using them effectively.
From Server Components
When called from a Server Component, the Server Action executes on the server during the request-response cycle. After the action completes, the Server Component re-renders with fresh data.
// app/guestbook/page.tsx
import { revalidatePath } from 'next/cache'
import { getMessages, addMessage } from './actions'

export default async function GuestbookPage() {
  const messages = await getMessages()

  return (
    <div>
      <h1>Guestbook</h1>
      <form action={addMessage}>
        <input name="message" placeholder="Leave a message" />
        <button type="submit">Post</button>
      </form>
      <ul>
        {messages.map((msg) => (
          <li key={msg.id}>{msg.text}</li>
        ))}
      </ul>
    </div>
  )
}
From Client Components
When called from a Client Component, the action is invoked through a network request, but React handles all the complexity transparently.
// app/like-button.tsx
'use client'

import { useState } from 'react'
import { likePost } from './actions'

export function LikeButton({ postId, initialLikes }: { postId: string; initialLikes: number }) {
  const [likes, setLikes] = useState(initialLikes)

  async function handleClick() {
    const result = await likePost(postId)
    setLikes(result.newCount)
  }

  return (
    <button onClick={handleClick}>
      {likes} {likes === 1 ? 'like' : 'likes'}
    </button>
  )
}
Defining Server Actions: Best Practices
File Organization
Organize your Server Actions by feature for better maintainability:
app/
├── actions/
│   ├── index.ts              # Re-exports all actions
│   ├── contact.ts            # Contact form actions
│   ├── newsletter.ts         # Newsletter actions
│   ├── users.ts              # User CRUD actions
│   └── posts.ts              # Post CRUD actions
Inline vs. Module-Level Server Actions
Use inline Server Actions for simple, single-use cases:
// app/contact/page.tsx
export default function ContactPage() {
  async function submitContact(formData: FormData) {
    'use server'
    // Simple logic here
  }

  return <form action={submitContact}>...</form>
}
Use module-level Server Actions for reusable logic:
// app/actions/users.ts
'use server'

import { db } from '@/lib/db'
import { z } from 'zod'

const createUserSchema = z.object({
  name: z.string().min(2),
  email: z.string().email(),
})

export async function createUser(formData: FormData) {
  // Reusable, well-tested action
}
Form Handling with Server Actions
Basic Contact Form
Let's build a production-ready contact form with validation and error handling:
// app/actions/contact.ts
'use server'

import { z } from 'zod'
import { revalidatePath } from 'next/cache'

const contactFormSchema = z.object({
  name: z.string().min(2, 'Name must be at least 2 characters'),
  email: z.string().email('Invalid email address'),
  subject: z.string().min(5, 'Subject must be at least 5 characters'),
  message: z.string().min(10, 'Message must be at least 10 characters'),
})

export type ContactFormState = {
  success: boolean
  errors?: Record<string, string[]>
  message?: string
}

export async function submitContactForm(
  prevState: ContactFormState,
  formData: FormData
): Promise<ContactFormState> {
  // 1. Validate input
  const validatedFields = contactFormSchema.safeParse({
    name: formData.get('name'),
    email: formData.get('email'),
    subject: formData.get('subject'),
    message: formData.get('message'),
  })

  if (!validatedFields.success) {
    return {
      success: false,
      errors: validatedFields.error.flatten().fieldErrors,
      message: 'Please fix the errors above.',
    }
  }

  const { name, email, subject, message } = validatedFields.data

  try {
    // 2. Send email (or save to database)
    await sendEmail({ to: 'contact@example.com, subject, body: message })

    // 3. Revalidate if needed
    revalidatePath('/contact')

    return {
      success: true,
      message: 'Thank you for your message! We\'ll get back to you soon.',
    }
  } catch (error) {
    return {
      success: false,
      message: 'Something went wrong. Please try again.',
    }
  }
}

async function sendEmail(data: { to: string; subject: string; body: string }) {
  // Email sending logic
}
Now create the form component with error handling:
// app/contact/page.tsx
'use client'

import { useFormState } from 'react-dom'
import { submitContactForm, type ContactFormState } from '../actions/contact'

const initialState: ContactFormState = {
  success: false,
}

export function ContactForm() {
  const [state, formAction] = useFormState(submitContactForm, initialState)

  return (
    <form action={formAction} className="space-y-4">
      <div>
        <label htmlFor="name">Name</label>
        <input
          type="text"
          id="name"
          name="name"
          className={state.errors?.name ? 'border-red-500' : ''}
        />
        {state.errors?.name && (
          <p className="text-red-500 text-sm">{state.errors.name[0]}</p>
        )}
      </div>

      <div>
        <label htmlFor="email">Email</label>
        <input
          type="email"
          id="email"
          name="email"
          className={state.errors?.email ? 'border-red-500' : ''}
        />
        {state.errors?.email && (
          <p className="text-red-500 text-sm">{state.errors.email[0]}</p>
        )}
      </div>

      <div>
        <label htmlFor="subject">Subject</label>
        <input
          type="text"
          id="subject"
          name="subject"
          className={state.errors?.subject ? 'border-red-500' : ''}
        />
        {state.errors?.subject && (
          <p className="text-red-500 text-sm">{state.errors.subject[0]}</p>
        )}
      </div>

      <div>
        <label htmlFor="message">Message</label>
        <textarea
          id="message"
          name="message"
          rows={5}
          className={state.errors?.message ? 'border-red-500' : ''}
        />
        {state.errors?.message && (
          <p className="text-red-500 text-sm">{state.errors.message[0]}</p>
        )}
      </div>

      {state.message && (
        <p className={state.success ? 'text-green-500' : 'text-red-500'}>
          {state.message}
        </p>
      )}

      <button
        type="submit"
        className="px-4 py-2 bg-blue-500 text-white rounded"
      >
        Send Message
      </button>
    </form>
  )
}
Real-World Example: Newsletter Signup
A simple but complete newsletter signup with duplicate prevention:
// app/actions/newsletter.ts
'use server'

import { z } from 'zod'
import { db } from '@/lib/db'

const newsletterSchema = z.object({
  email: z.string().email('Invalid email address'),
  source: z.enum(['homepage', 'footer', 'blog']).default('homepage'),
})

export type NewsletterState = {
  success: boolean
  message: string
}

export async function subscribeNewsletter(
  prevState: NewsletterState,
  formData: FormData
): Promise<NewsletterState> {
  const email = formData.get('email') as string
  const source = formData.get('source') as string

  // Validate
  const result = newsletterSchema.safeParse({ email, source })
  if (!result.success) {
    return { success: false, message: result.error.errors[0].message }
  }

  try {
    // Check for existing subscriber
    const existing = await db.newsletter.findUnique({
      where: { email: result.data.email },
    })

    if (existing) {
      return {
        success: false,
        message: 'This email is already subscribed.',
      }
    }

    // Add to database
    await db.newsletter.create({
      data: {
        email: result.data.email,
        source: result.data.source,
        subscribedAt: new Date(),
      },
    })

    return {
      success: true,
      message: 'Successfully subscribed! Check your email for confirmation.',
    }
  } catch {
    return {
      success: false,
      message: 'An error occurred. Please try again.',
    }
  }
}
Real-World Example: CRUD Operations
Server Actions shine when building CRUD interfaces. Here's a complete example for managing blog posts:
Create Operation
// app/actions/posts.ts
'use server'

import { auth } from '@/lib/auth'
import { db } from '@/lib/db'
import { revalidatePath } from 'next/cache'
import { redirect } from 'next/navigation'

export async function createPost(formData: FormData) {
  // 1. Check authentication
  const session = await auth()
  if (!session?.user) {
    return { error: 'Unauthorized' }
  }

  // 2. Extract and validate data
  const title = formData.get('title') as string
  const content = formData.get('content') as string
  const published = formData.get('published') === 'true'

  if (!title || !content) {
    return { error: 'Title and content are required' }
  }

  // 3. Create post
  const post = await db.post.create({
    data: {
      title,
      content,
      published,
      authorId: session.user.id,
    },
  })

  // 4. Revalidate cache and redirect
  revalidatePath('/posts')
  revalidatePath('/admin/posts')
  redirect(`/posts/${post.id}`)
}
Update Operation
export async function updatePost(
  postId: string,
  prevState: any,
  formData: FormData
) {
  const session = await auth()
  if (!session?.user) {
    return { error: 'Unauthorized' }
  }

  // Check ownership
  const post = await db.post.findUnique({
    where: { id: postId },
  })

  if (!post || post.authorId !== session.user.id) {
    return { error: 'Forbidden' }
  }

  // Update post
  await db.post.update({
    where: { id: postId },
    data: {
      title: formData.get('title') as string,
      content: formData.get('content') as string,
      published: formData.get('published') === 'true',
      updatedAt: new Date(),
    },
  })

  revalidatePath('/posts')
  revalidatePath(`/posts/${postId}`)
  revalidatePath('/admin/posts')

  return { success: true }
}
Delete Operation
export async function deletePost(postId: string) {
  const session = await auth()
  if (!session?.user) {
    return { error: 'Unauthorized' }
  }

  const post = await db.post.findUnique({
    where: { id: postId },
  })

  if (!post || post.authorId !== session.user.id) {
    return { error: 'Forbidden' }
  }

  await db.post.delete({
    where: { id: postId },
  })

  revalidatePath('/posts')
  revalidatePath('/admin/posts')

  return { success: true }
}
Usage in a Component
// app/admin/posts/page.tsx
'use client'

import { useState } from 'react'
import { deletePost } from '@/app/actions/posts'

export function PostActions({ postId }: { postId: string }) {
  const [isDeleting, setIsDeleting] = useState(false)

  async function handleDelete() {
    if (!confirm('Are you sure you want to delete this post?')) return

    setIsDeleting(true)
    const result = await deletePost(postId)

    if (result.error) {
      alert(result.error)
      setIsDeleting(false)
    }
  }

  return (
    <button
      onClick={handleDelete}
      disabled={isDeleting}
      className="text-red-500 hover:text-red-700"
    >
      {isDeleting ? 'Deleting...' : 'Delete'}
    </button>
  )
}
Real-World Example: File Uploads
Handling file uploads with Server Actions requires a slightly different approach:
// app/actions/upload.ts
'use server'

import { writeFile, mkdir } from 'fs/promises'
import { join } from 'path'
import { randomUUID } from 'crypto'

export async function uploadFile(formData: FormData) {
  const file = formData.get('file') as File

  if (!file) {
    return { error: 'No file provided' }
  }

  // Validate file type
  const allowedTypes = ['image/jpeg', 'image/png', 'image/webp']
  if (!allowedTypes.includes(file.type)) {
    return { error: 'Invalid file type. Only JPEG, PNG, and WebP are allowed.' }
  }

  // Validate file size (5MB max)
  const maxSize = 5 * 1024 * 1024 // 5MB in bytes
  if (file.size > maxSize) {
    return { error: 'File too large. Maximum size is 5MB.' }
  }

  try {
    const bytes = await file.arrayBuffer()
    const buffer = Buffer.from(bytes)

    // Generate unique filename
    const ext = file.name.split('.').pop()
    const filename = `${randomUUID()}.${ext}`

    // Create uploads directory if it doesn't exist
    const uploadDir = join(process.cwd(), 'public', 'uploads')
    await mkdir(uploadDir, { recursive: true })

    // Write file
    const filepath = join(uploadDir, filename)
    await writeFile(filepath, buffer)

    return {
      success: true,
      url: `/uploads/${filename}`,
    }
  } catch (error) {
    return { error: 'Failed to upload file' }
  }
}
The upload form component:
// components/UploadForm.tsx
'use client'

import { useState } from 'react'
import { uploadFile } from '@/app/actions/upload'

export function UploadForm() {
  const [uploading, setUploading] = useState(false)
  const [result, setResult] = useState<{ url?: string; error?: string } | null>(null)

  async function handleSubmit(formData: FormData) {
    setUploading(true)
    setResult(null)

    const response = await uploadFile(formData)
    setResult(response)
    setUploading(false)
  }

  return (
    <form action={handleSubmit}>
      <input type="file" name="file" accept="image/*" required />
      <button type="submit" disabled={uploading}>
        {uploading ? 'Uploading...' : 'Upload'}
      </button>

      {result?.url && (
        <div>
          <p>Upload successful!</p>
          <img src={result.url} alt="Uploaded" />
        </div>
      )}

      {result?.error && (
        <p className="text-red-500">{result.error}</p>
      )}
    </form>
  )
}
Error Handling and Validation Patterns
Using Zod for Validation
Zod is the recommended library for validation in Server Actions:
import { z } from 'zod'

const userSchema = z.object({
  name: z.string().min(2).max(100),
  email: z.string().email(),
  age: z.number().min(18).max(120).optional(),
  role: z.enum(['user', 'admin', 'moderator']),
})

export async function createUser(formData: FormData) {
  // Parse and validate
  const result = userSchema.safeParse({
    name: formData.get('name'),
    email: formData.get('email'),
    age: formData.get('age') ? Number(formData.get('age')) : undefined,
    role: formData.get('role'),
  })

  if (!result.success) {
    // Return detailed validation errors
    return {
      success: false,
      errors: result.error.flatten().fieldErrors,
    }
  }

  // Use validated data
  const user = await db.user.create({ data: result.data })
  return { success: true, user }
}
Custom Error Handling
// app/lib/errors.ts
export class ValidationError extends Error {
  constructor(public fieldErrors: Record<string, string[]>) {
    super('Validation failed')
    this.name = 'ValidationError'
  }
}

export class AuthenticationError extends Error {
  constructor(message = 'Authentication required') {
    super(message)
    this.name = 'AuthenticationError'
  }
}

export class AuthorizationError extends Error {
  constructor(message = 'You do not have permission') {
    super(message)
    this.name = 'AuthorizationError'
  }
}

// Usage in actions
import { ValidationError, AuthenticationError } from '@/lib/errors'

export async function sensitiveAction(formData: FormData) {
  try {
    // Your logic here
  } catch (error) {
    if (error instanceof ValidationError) {
      return { success: false, errors: error.fieldErrors }
    }
    if (error instanceof AuthenticationError) {
      return { success: false, message: error.message }
    }
    // Log unexpected errors
    console.error('Unexpected error:', error)
    return { success: false, message: 'An unexpected error occurred' }
  }
}
Loading States and Optimistic Updates
Using useFormStatus for Loading States
React 19 introduces `useFormStatus` hook specifically for Server Actions:
// app/components/SubmitButton.tsx
'use client'

import { useFormStatus } from 'react-dom'

export function SubmitButton({ children }: { children: React.ReactNode }) {
  const { pending } = useFormStatus()

  return (
    <button
      type="submit"
      disabled={pending}
      className={pending ? 'opacity-50 cursor-not-allowed' : ''}
    >
      {pending ? 'Submitting...' : children}
    </button>
  )
}
Optimistic UI Updates
For instant feedback, use optimistic updates:
// app/components/LikeButton.tsx
'use client'

import { useState, useTransition } from 'react'
import { likePost } from '@/app/actions/posts'

export function LikeButton({
  postId,
  initialLikes,
  initialLiked,
}: {
  postId: string
  initialLikes: number
  initialLiked: boolean
}) {
  const [likes, setLikes] = useState(initialLikes)
  const [liked, setLiked] = useState(initialLiked)
  const [isPending, startTransition] = useTransition()

  function handleClick() {
    // Optimistic update
    setLiked(!liked)
    setLikes(prev => liked ? prev - 1 : prev + 1)

    // Server action
    startTransition(async () => {
      const result = await likePost(postId)
      // Revert if there's an error
      if (result.error) {
        setLiked(initialLiked)
        setLikes(initialLikes)
      }
    })
  }

  return (
    <button
      onClick={handleClick}
      disabled={isPending}
      className={`flex items-center gap-2 ${liked ? 'text-red-500' : ''}`}
    >
      <span>{liked ? '♥' : '♡'}</span>
      <span>{likes}</span>
    </button>
  )
}
Security Considerations
Server Actions have built-in security features, but you must follow best practices:
1. Always Validate Input
Never trust client data. Always validate on the server:
import { z } from 'zod'

const schema = z.object({
  // Strict validation
  email: z.string().email().max(255).trim(),
  message: z.string().min(1).max(5000).transform(s => s.trim()),
})

export async function submitForm(formData: FormData) {
  const validated = schema.parse({
    email: formData.get('email'),
    message: formData.get('message'),
  })
  // Use validated data
}
2. Check Authentication and Authorization
import { auth } from '@/lib/auth'
import { redirect } from 'next/navigation'

export async function adminAction(formData: FormData) {
  const session = await auth()

  if (!session?.user) {
    redirect('/login')
  }

  if (session.user.role !== 'admin') {
    return { error: 'Forbidden' }
  }

  // Proceed with action
}
3. Rate Limiting
Implement rate limiting to prevent abuse:
// app/lib/rate-limit.ts
import { ratelimit } from '@/lib/upstash'

export async function checkRateLimit(
  identifier: string,
  limit: number = 5,
  window: number = 60000 // 1 minute
) {
  const { success } = await ratelimit.limit(identifier)
  if (!success) {
    throw new Error('Too many requests. Please try again later.')
  }
}

// Usage
export async function submitForm(formData: FormData) {
  const email = formData.get('email') as string
  await checkRateLimit(`form-submit:${email}`, 5, 60000)

  // Proceed with form handling
}
4. CSRF Protection
Server Actions include built-in CSRF protection. The framework automatically generates and validates CSRF tokens for forms with actions.
5. Sensitive Data Handling
Never expose sensitive data in error messages:
// Bad
try {
  const user = await db.user.findUnique({ where: { id } })
  if (!user) {
    return { error: `User not found with id: ${id}` }
  }
} catch (error) {
  return { error: `Database error: ${error.message}` } // Exposes internals
}

// Good
try {
  const user = await db.user.findUnique({ where: { id } })
  if (!user) {
    return { error: 'Resource not found' }
  }
} catch (error) {
  console.error('Database error:', error) // Log internally
  return { error: 'An error occurred. Please try again.' }
}
Best Practices and Patterns
1. Use TypeScript Generics for Reusable Actions
// app/actions/crud.ts
'use server'

type CrudResult<T> = {
  success: boolean
  data?: T
  error?: string
}

export async function createResource<T>(
  model: any,
  data: T
): Promise<CrudResult<T>> {
  try {
    const result = await model.create({ data })
    return { success: true, data: result }
  } catch (error) {
    return { success: false, error: 'Failed to create resource' }
  }
}
2. Centralize Revalidation Logic
// app/lib/revalidation.ts
import { revalidatePath, revalidateTag } from 'next/cache'

export function revalidatePost(postId: string) {
  revalidatePath('/posts')
  revalidatePath(`/posts/${postId}`)
  revalidateTag('posts')
}

export function revalidateUser(userId: string) {
  revalidatePath('/users')
  revalidatePath(`/users/${userId}`)
  revalidatePath('/profile')
}
3. Use Action Composition
// app/actions/order.ts
'use server'

import { validateInventory } from './inventory'
import { processPayment } from './payment'
import { createShipment } from './shipping'

export async function placeOrder(formData: FormData) {
  // Step 1: Validate inventory
  const inventory = await validateInventory(formData)
  if (!inventory.success) return inventory

  // Step 2: Process payment
  const payment = await processPayment(formData)
  if (!payment.success) return payment

  // Step 3: Create shipment
  const shipment = await createShipment(payment.data)

  return { success: true, order: shipment.data }
}
4. Implement Action Logging
// app/lib/action-logger.ts
import { auth } from '@/lib/auth'

export async function logAction(action: string, metadata: any) {
  const session = await auth()

  await db.actionLog.create({
    data: {
      action,
      userId: session?.user?.id,
      metadata,
      timestamp: new Date(),
      ip: metadata.headers?.get('x-forwarded-for'),
    },
  })
}

// Usage
export async function deleteUser(formData: FormData) {
  const userId = formData.get('id') as string

  await logAction('DELETE_USER', { userId })

  // ... rest of logic
}
Common Pitfalls to Avoid
1. Forgetting to Revalidate Data
After mutating data, always revalidate the cache:
export async function updatePost(formData: FormData) {
  await db.post.update({ /* ... */ } )

  // Don't forget to revalidate!
  revalidatePath('/posts')
  revalidatePath(`/posts/${postId}`)
}
2. Not Handling FormData Correctly
Remember that FormData values are always strings (or File):
// Bad
const age: number = formData.get('age')

// Good
const age = Number(formData.get('age')) || 0
// Or better with validation
const age = z.coerce.number().parse(formData.get('age'))
3. Using Client-Only Libraries
Server Actions run on the server. Don't import client libraries:
// Bad - localStorage doesn't exist on server
'use server'
import { localStorage } from 'local-storage'

// Good - Use cookies or database
import { cookies } from 'next/headers'
4. Not Using TypeScript Properly
Leverage TypeScript for better type safety:
// Define types for your form data
type CommentInput = {
  postId: string
  content: string
  authorId: string
}

// Use types in your action
export async function createComment(input: CommentInput) {
  // TypeScript will help catch errors
}
5. Ignoring Error Boundaries
Always implement error boundaries for better user experience:
// app/error.tsx
'use client'

export default function Error({
  error,
  reset,
}: {
  error: Error
  reset: () => void
}) {
  return (
    <div>
      <h2>Something went wrong!</h2>
      <p>{error.message}</p>
      <button onClick={reset}>Try again</button>
    </div>
  )
}
Migration Guide: From API Routes to Server Actions
If you're migrating existing API routes to Server Actions, here's a quick reference:
| API Route | Server Action |
|-----------|---------------|
| `export async function POST(request)` | `export async function action(formData)` |
| `await request.json()` | `formData.get('key')` |
| `return NextResponse.json(data)` | `return data` (object) |
| Manual route creation | Automatic via `'use server'` |
| `/api/endpoint` URL | Direct import from `@/app/actions` |
Frequently Asked Questions
Are Server Actions secure?
Yes, Server Actions include built-in security features like CSRF protection, but you must still validate input, check authentication, and implement rate limiting for production applications.
Can I use Server Actions with third-party APIs?
Absolutely. Server Actions can call any third-party API since they run on the server. This is actually one of their strengths—keeping API keys secure on the server.
Do Server Actions work with static exports?
Server Actions require a server to execute. They do not work with `output: 'export'` static exports. Use API routes or deploy to a serverful platform like Vercel.
How do I test Server Actions?
You can test Server Actions directly in unit tests since they're just async functions:
import { createUser } from '@/app/actions/users'

describe('createUser', () => {
  it('should create a user', async () => {
    const formData = new FormData()
    formData.append('name', 'John Doe')
    formData.append('email', 'john@example.com')

    const result = await createUser(formData)
    expect(result.success).toBe(true)
  })
})
Can I use Server Actions with middleware?
Yes. Middleware runs before Server Actions, making it perfect for authentication checks, redirects, and request logging.
What's the difference between Server Actions and Route Handlers?
Server Actions are designed for form submissions and mutations triggered by user actions. Route Handlers are better for building API endpoints that need REST semantics or are consumed by external clients.
Do Server Actions work without JavaScript?
Yes! When JavaScript is disabled, forms using Server Actions fall back to standard HTML form submissions, ensuring your application remains functional.
Key Takeaways
React Server Actions represent a significant improvement in how we handle data mutations in Next.js applications:
1. **Simplified Architecture**: No need to create separate API routes for simple mutations
2. **Type Safety**: Full TypeScript support with automatic type inference
3. **Better UX**: Built-in loading states, error handling, and progressive enhancement
4. **Security First**: Built-in CSRF protection and server-side execution
5. **Developer Experience**: Less boilerplate code and cleaner components
To get the most out of Server Actions:
- Always validate input with Zod or a similar library
- Implement proper authentication and authorization checks
- Use `revalidatePath` or `revalidateTag` after mutations
- Handle errors gracefully with try-catch blocks
- Add rate limiting for public-facing actions
- Leverage `useFormStatus` and `useTransition` for better UX
Server Actions are the future of form handling in Next.js. Start incorporating them into your projects today to build faster, more secure, and more maintainable applications.
For more on React Server Components, check out our guide on [Understanding React Server Components in Next.js](/blog/next-js-server-components). If you're migrating from an older Next.js version, see our [Next.js 16 App Router Migration Guide](/blog/next-js-16-app-router-migration-guide).
Related Articles
Understanding React Server Components in Next.js 15
A deep dive into how Server Components work, when to use them, and common patterns.
FrameworkNext.js 16 App Router: Complete Migration Guide from Pages Router
Step-by-step guide to migrate from Next.js Pages Router to App Router. Learn about file structure changes, data fetching patterns, layouts, and common pitfalls.
TutorialNext.js 16 Static Exports: Complete Guide to Zero-Runtime Deployment
Master Next.js 16 static exports for zero-runtime deployment. Learn configuration, benefits, limitations, and deployment strategies with practical examples and hosting comparisons.